Scratches on your car aren’t just cosmetic. Some are harmless, others expose bare metal and invite rust. The mistake most people make is treating all scratches the same — either by overpaying for professional repairs or by using the wrong DIY fix that makes things worse.
This guide breaks down how to identify the type of scratch you have, which ones you can fix at home, and when you should stop before you permanently damage your paint.
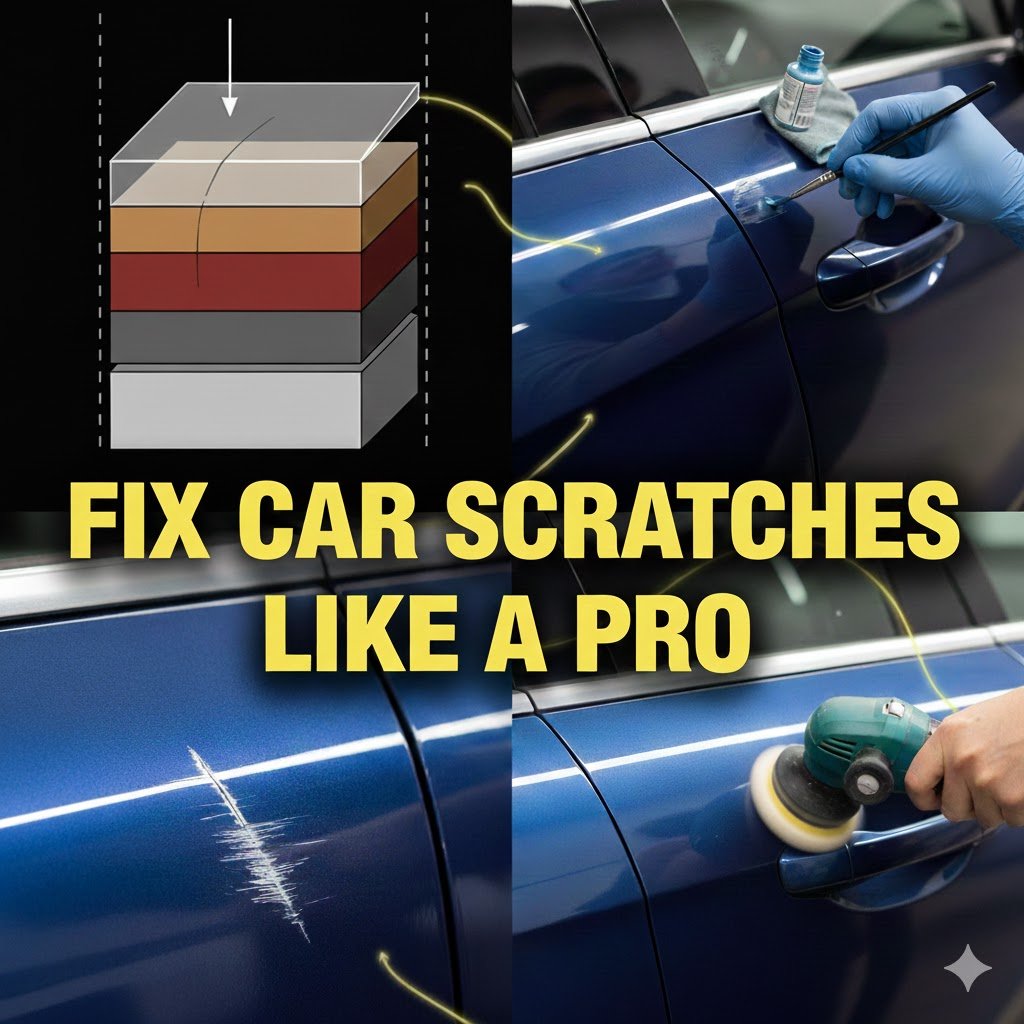
Step 1: Identify the Type of Scratch (This Matters More Than the Fix)
Every car has multiple paint layers:
- Clear coat
- Base color coat
- Primer
- Bare metal
How deep the scratch goes determines the repair.
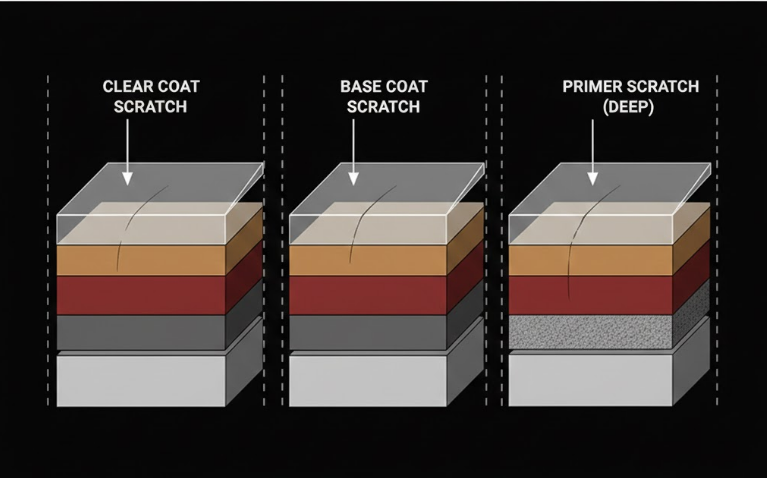
Scratch Types Explained
- Clear coat scratches: Light swirls, fingernail doesn’t catch
- Paint scratches: Color layer damaged, visible contrast
- Deep scratches: Primer or metal exposed
If your fingernail catches firmly, it’s not a surface scratch anymore.
Fixing the wrong way at this stage is how people permanently ruin paint.
Step 2: Fix Light Clear Coat Scratches
These are the easiest and safest to fix at home.
What You’ll Need
- Car wash soap
- Microfiber towels
- Scratch remover or polishing compound
Process
- Wash and dry the area thoroughly
- Apply scratch remover using a microfiber cloth
- Rub in small circular motions
- Buff off residue
Light scratches disappear because you’re leveling the clear coat — not “filling” the scratch.
Do not use household abrasives. Toothpaste is not a car care product. Anyone telling you otherwise is guessing.
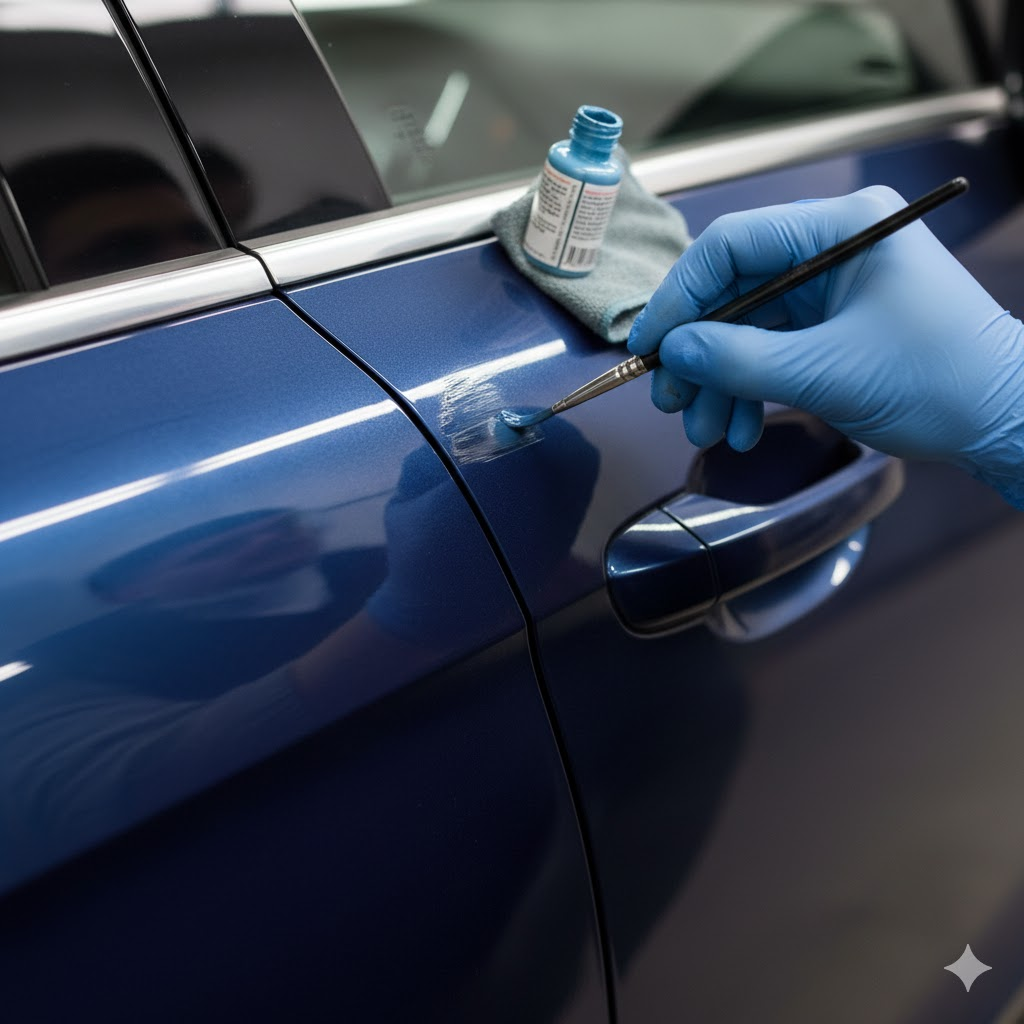
Step 3: Repair Paint-Level Scratches
Once the color layer is damaged, polishing alone won’t fix it.
What You’ll Need
- Touch-up paint (exact color code)
- Fine-grit sandpaper (2000–3000 grit)
- Clear coat pen
- Microfiber towels
Process
- Clean and degrease the area
- Lightly sand the scratch edges (don’t widen it)
- Apply thin layers of touch-up paint
- Let it cure completely
- Apply clear coat
- Lightly polish to blend
Rushing drying time ruins the repair. Thin layers matter more than coverage.
Step 4: Deal with Deep Scratches (Primer or Metal Exposed)
If you see grey primer or bare metal, this is no longer optional.
Why This Is Urgent
- Exposed metal will rust
- Rust spreads under paint
- Delayed repair increases cost
Temporary DIY Fix
- Clean the area
- Apply rust inhibitor
- Use touch-up paint as a seal
This is damage control, not restoration. Professional repainting is the correct solution.
Step 5: When Not to Fix It Yourself
DIY stops being smart when:
- The scratch spans large panels
- Metallic or pearl paint is involved
- Multiple layers are damaged
- You want a perfect finish
Professional body shops blend paint across panels to hide transitions. You can’t replicate that in a driveway.
[Image Placeholder: Professional paint correction process]
Trying anyway usually leaves visible blobs, mismatched color, and sanding marks — all worse than the original scratch.
Preventing Future Scratches (Most People Ignore This)
Scratches usually come from habits, not accidents.
High-Risk Behaviors
- Automatic brush car washes
- Dry wiping dust off paint
- Parking too close to others
- Using dirty microfiber towels
Smart Prevention
- Hand wash with proper tools
- Apply wax or ceramic coating
- Keep paint protected and lubricated
Paint protection is cheaper than paint repair. Always.
Final Reality Check
Scratches are only a big problem when people:
- Misjudge depth
- Use the wrong repair method
- Rush the process
- Expect miracles from cheap products
Fix light scratches early. Seal deep ones immediately. Know when to stop.