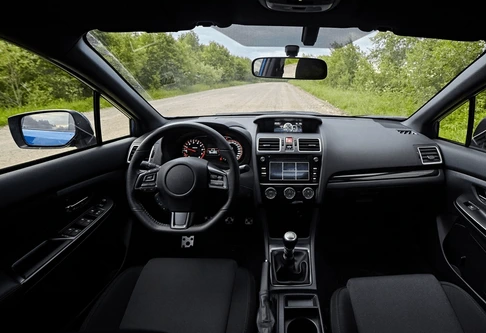
My car interior was disgusting after two years of neglect. Food crumbs ground into carpet, mystery stains on seats, dust everywhere, sticky cup holders, and a smell I couldn’t identify. It looked like a rental car at the end of summer.
Thought about paying a detailer. They wanted $200-300 for interior deep clean. That’s rent money.
Decided to try it myself. Watched a bunch of YouTube videos. Looked overwhelming but figured I’d save money and learn something.
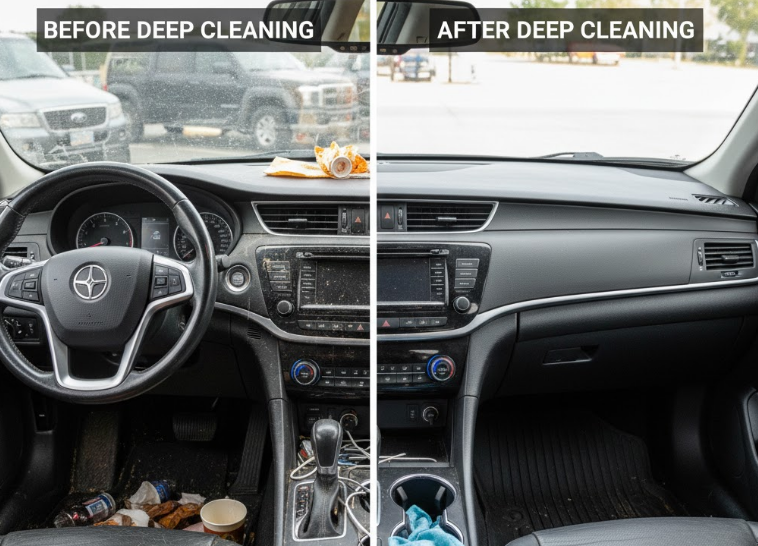
Spent a Saturday doing it. Took about 6 hours including breaks. Cost maybe $60 in supplies. Car interior looked better than the day I bought it.
Been doing it myself twice a year since then. It’s really not that hard once you know the process.
The Short Answer
Vacuum everything thoroughly, wipe down all surfaces with all-purpose cleaner, scrub seats and carpet with upholstery cleaner, clean windows, let it dry completely.
You need: vacuum, spray bottles, microfiber towels, upholstery cleaner, all-purpose cleaner, brush. Total cost: $50-80 if starting from scratch.
Takes 4-6 hours for thorough job. Spread over weekend if needed.
Results rival professional detailing at 1/4 the cost. I’ve done this maybe 10 times now and always amazed at the difference.
What You Actually Need
Essential supplies:
- Shop vac or powerful vacuum ($50-100 one-time, or borrow)
- All-purpose cleaner ($5-8)
- Upholstery/carpet cleaner ($10-15)
- Microfiber towels – pack of 12+ ($12-15)
- Soft scrub brush ($8-10)
- Glass cleaner ($5)
- Trash bags
Nice to have:
- Detail brushes for tight spots ($8-12)
- Drill brush attachment ($10-15)
- Compressed air can ($6)
- Interior protectant/conditioner ($10-15)
Don’t waste money on:
- $50 “professional detail kits” with mediocre products
- Steam cleaners (nice but not necessary)
- Fancy leather cleaners unless you have actual leather
I started with just the essentials. Added nice-to-haves later when I realized I’d keep doing this.
Total initial investment: about $60. Supplies last multiple cleanings.
My First Deep Clean Experience
Approached it Sunday morning thinking it would take 2-3 hours. Took 6 hours. Here’s what I didn’t expect:
Hour 1 – Just vacuuming. Moved seats around, vacuumed under them, got into every crevice. Found fries from 2019.
Hour 2 – Wiping down all plastic surfaces. Way more surface area than I thought. Couldn’t reach some spots easily.
Hour 3 – Scrubbing seats. Realized how dirty they actually were. Water came up brown. Gross but satisfying.
Hour 4 – Carpet cleaning. This took forever. Multiple passes needed. Letting it dry between passes.
Hour 5 – Detail work. Cup holders, vents, door jambs, all the stuff I missed first time through.
Hour 6 – Windows and final touches. By now I was tired but car looked amazing.
First time is longest. Now I can do it in 4 hours because I know the process.
The Actual Step-By-Step Process
Step 1: Remove everything
- Take out floor mats
- Remove all trash, stuff from seats, console, pockets
- Take out loose items from trunk
- Clear glove box and center console
Do this first. You’ll be shocked how much crap you’ve accumulated.
I found three phone chargers, $7 in change, and a sandwich I don’t remember buying.
Step 2: Vacuum thoroughly
- Start with seats – remove and vacuum under them if possible
- Do carpet – multiple passes
- Get in all cracks and crevices
- Don’t forget under seats, between console and seats
- Vacuum door pockets and console
- Trunk area
This is most important step. If you skip thorough vacuuming, everything else is pointless.
Use crevice tool for tight spots. Get in there. Don’t be lazy.
Step 3: Wipe down all hard surfaces
- Spray all-purpose cleaner on dashboard, console, doors
- Wipe with microfiber towel
- Do steering wheel, shift knob, buttons, everything
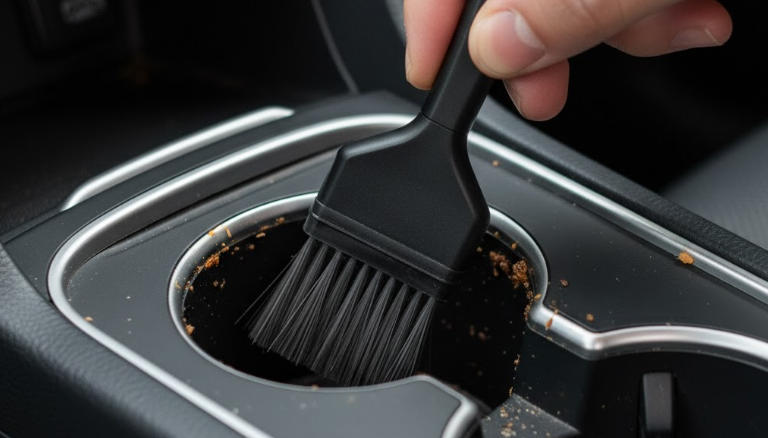
- Clean cup holders (use detail brush for stuck-on gunk)
- Don’t forget door jambs and sills
I use Simple Green diluted 1:10. Works great, cheap, not harsh.
Cup holders are always nastiest. Let cleaner soak if stuff is really stuck.
Step 4: Clean seats and upholstery
- Spray upholstery cleaner on seats
- Scrub with soft brush in circular motions
- Wipe away dirty foam with clean towel
- Repeat until towel comes back clean
- Let dry completely before sitting
For bad stains, spray and let sit 5 minutes before scrubbing.
I use Turtle Wax upholstery cleaner. $12, works well.
The water coming off was brown-black first time. My seats looked fine but were apparently filthy.
Step 5: Clean carpet
- Spray carpet cleaner liberally
- Scrub with brush
- Wipe up dirty solution with towels
- Repeat if needed
- Let dry completely – this takes hours
Floor mats same process. Do those outside so they can dry in sun.
Carpet takes forever to dry. Do this on sunny day with windows down. Or run car with heat on.
Step 6: Clean windows
- Spray glass cleaner
- Wipe with clean microfiber – inside and outside
- Buff with dry towel to prevent streaks
- Don’t forget rear window and mirrors
Do windows last so you don’t get cleaner overspray on clean glass.
I use Invisible Glass. $6, streak-free, works great.
Step 7: Details and finishing
- Clean door jambs
- Wipe down seat belts
- Clean center console storage
- Apply protectant to dashboard if you want
- Replace floor mats when dry
These little details make huge difference in overall result.
Dealing With Specific Problems
Mystery stains on seats:
- Spray heavily with upholstery cleaner
- Let soak 10 minutes
- Scrub hard with brush
- Blot with towel
- Repeat until gone or as good as it’ll get
Some stains are permanent. Do your best, move on.
Ground-in dirt in carpet:
- Vacuum first
- Spray cleaner and let soak
- Scrub with stiff brush
- Vacuum again when dry
- Multiple passes may be needed
The carpet in my driver’s side footwell needed three cleaning cycles. Worth it.
Sticky residue on hard surfaces:
- Spray all-purpose cleaner and let sit
- Scrub with brush or rough side of sponge
- Wipe clean
- May need stronger cleaner like Goo Gone for really stuck stuff
Had sticker residue on dashboard. Goo Gone removed it but smells terrible. Use sparingly.
Awful smell:
- Source is usually carpet or under seats
- Clean thoroughly
- Sprinkle baking soda on carpet overnight, vacuum next day
- Replace cabin air filter if smell through vents
- Sometimes smell is just in your head after staring at dirty car
After deep clean my car smelled like cleaning products for a day, then just fresh and clean.
Pet hair:
- Vacuum with upholstery attachment
- Use rubber glove or squeegee to lift stubborn hair
- Vacuum again
- Repeat until you hate your dog (kidding)
Friend with shedding dog spends extra 30 minutes just on hair removal. Worth it if you have pets.
The Vacuum Situation
Good vacuum makes massive difference. House vacuum often isn’t powerful enough.
Options:
- Shop vac ($50-100) – Best option. Powerful, handles wet and dry.
- Borrow/rent shop vac – Free or cheap if you only do this occasionally.
- Car wash vacuum – Costs $1-2 for 5 minutes. Need lots of quarters.
- Your house vacuum – Better than nothing but probably won’t get deep dirt.
I bought $60 shop vac from Harbor Freight. Use it for garage stuff too. Worth the investment.
Attachments matter. Need crevice tool for tight spots, brush attachment for carpet.
Pro tip: Vacuum before cleaning, then vacuum again after carpet dries. Gets dirt that cleaning loosened.
Carpet And Upholstery Cleaning Products
Don’t overthink this. Mid-range products work fine.
Good options:
- Turtle Wax Carpet & Upholstery Cleaner ($10-12)
- Armor All Carpet & Upholstery Cleaner ($8-10)
- Chemical Guys Fabric Clean ($12-15)
- Resolve carpet cleaner ($8) – yes, the house carpet stuff works
Avoid:
- Cheapest generic brands – might not work well
- Overpriced “professional” products – you’re not a pro
- Anything claiming to “restore color” – suspicious
I’ve used Turtle Wax for years. Works great. One bottle does 3-4 full cleanings.
Spray, scrub, wipe. Don’t make it complicated.
The Drying Problem
This is the step everyone underestimates. Carpet and seats need hours to dry completely.
Speed up drying:
- Do on sunny day
- Park in sun with windows cracked
- Run heat full blast in car for 30 minutes
- Use fans if doing in garage
- Point shop vac at wet areas to suck out moisture
Don’t sit on damp seats or you’ll get wet butt and possibly mildew.
I learned this hard way. Cleaned seats at 4pm. Had to go somewhere at 6pm. Wet butt entire drive. Not fun.
Now I do deep cleans Saturday morning so everything has all day to dry.
For Leather Interiors
I have cloth so limited leather experience, but friends with leather say:
Leather cleaner ($12-15) – Specific to leather, not regular upholstery cleaner Leather conditioner ($12-15) – Prevents cracking, keeps leather soft Soft brush – Gentle on leather surface Process – Clean with leather cleaner, condition when dry
Leather is supposedly easier to clean than cloth. Less absorption, wipes off easier.
But needs conditioning or it cracks over time. Added maintenance.
Tools That Actually Help
Drill brush attachment ($12) – Attaches to power drill, scrubs carpet/seats way faster. Worth it if you have drill.
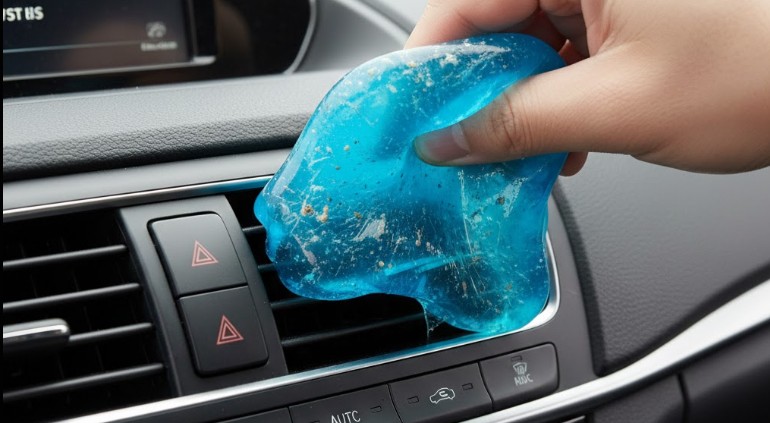
Detail brushes ($8-12 for set) – Small brushes for tight spots. Vents, cup holders, seams. Not essential but nice.
Compressed air ($6) – Blows dust from vents and crevices. Satisfying but not necessary.
Interior protectant ($10) – Makes dashboard and plastic look new. Optional cosmetic step.
I added drill brush second time I cleaned car. Cut scrubbing time in half. Best $12 I spent.
Detail brushes are handy but could use old toothbrush instead. Your call.
What Professional Detailers Do That You Can Skip
Steam cleaning – They use $1000+ steam machines. Nice but not necessary. Regular cleaning works fine.
Ozone treatment – For severe odors. Most people don’t need this.
Ceramic coating – Protects surfaces. Expensive. Not worth DIY hassle for most people.
Leather dyeing – Restores faded leather color. Advanced stuff you probably don’t need.
Headliner cleaning – Cleaning fabric roof is tricky. Easy to damage. Maybe leave to pros if needed.
Professional detailers have better tools and more experience. But for normal cleaning, DIY gets 90% of the result.
Mistakes I Made So You Don’t Have To
Used too much cleaner – More isn’t better. Just makes it harder to wipe up. Use thin layer.
Didn’t vacuum thoroughly first – Tried scrubbing carpet with dirt still in it. Just made mud. Vacuum well first.
Forgot windows were down – Started raining. Had to frantically dry interior. Check weather forecast.
Sat on wet seat – Mentioned earlier but worth repeating. Wait for seats to dry completely.
Cleaned on hot day – Cleaner dried too fast before I could wipe it up. Left residue. Moderate temperature is best.
Didn’t move seats – Missed tons of dirt under and between seats. Move seats all the way forward and back.
Learn from my stupidity. Follow the process properly.
Time-Saving Tricks
Do in sections – Clean front one day, back another. Less overwhelming.
Maintenance between deep cleans – Quick vacuum and wipe down monthly prevents dirt buildup.
Don’t eat in car – Seriously cuts down on crumbs and mess. I mostly stopped after seeing what I vacuumed up.
Floor mats – Good mats (rubber or all-weather) are way easier to clean than carpet. Consider upgrading.
Keep trash bag in car – Empty regularly before trash accumulates.
I now do quick 15-minute maintenance clean every 2-3 weeks. Makes deep cleans way easier because car never gets terrible.
The Satisfaction Factor
There’s something deeply satisfying about deep cleaning your car.
Seeing dirty water from scrubbing seats, vacuuming up pounds of dirt, transforming disaster into pristine interior.
It’s way more rewarding than paying someone to do it. You did that. You made this happen.
Plus you save $150-250 versus paying detailer. Money you can spend on actual car stuff that matters.
First time I finished I just sat in my clean car for 10 minutes admiring my work. Probably weird but whatever.
Maintaining The Clean
After 6 hours of cleaning, you don’t want to let it get disgusting again.
Weekly:
- Quick vacuum
- Wipe down dashboard
- Empty trash
Monthly:
- Thorough vacuum
- Wipe all surfaces
- Clean windows
Every 6 months:
- Full deep clean
This maintenance schedule keeps car presentable year-round. Never gets overwhelming.
For Really Bad Situations
If your car is absolutely destroyed – smoke damage, pet accidents, months of neglect – consider:
Professional deep clean first – Let them handle worst of it, then maintain yourself.
Replace carpet – Sometimes carpet is beyond saving. Cheaper than you’d think.
Ozone treatment – For smoke or severe odors pros can’t remove with cleaning.
New seat covers – If seats are truly ruined, covers are cheaper than reupholstering.
My car was bad but not destroyed. If yours is really terrible, might need pro help first time.
What I’d Tell Someone Starting Out
Buy shop vac ($50-60), basic cleaners ($20-30), microfiber towels ($12). Total $80-100 initial investment.
Pick a Saturday morning. Clear schedule for whole day. Don’t rush it.
Follow the process: vacuum, hard surfaces, seats, carpet, windows, details.
Let everything dry completely before using car.
You’ll save $150+ versus paying someone and learn valuable skill.
First time takes longest. Gets faster with practice. I can knock out full clean in 3-4 hours now.
The Real Answer
Deep cleaning car interior at home is totally doable and saves huge money.
You need basic supplies ($60-80), shop vac, and a Saturday. That’s it.
The process is straightforward: vacuum everything, clean all surfaces with appropriate cleaners, let dry.
Results rival professional detailing at fraction of cost. I’ve saved probably $1500+ over the years doing it myself.
Car interiors aren’t that complicated. Just dirt and grime you remove with cleaning products and elbow grease.
I was intimidated first time. Turned out to be easier than expected. Now it’s just routine maintenance twice a year.
Your car probably needs this. It’s been a while. Set aside a weekend and just do it. You’ll be glad you did.
Plus you can judge other people’s dirty cars from your high horse of having a clean interior. Best part honestly.